Screenshot
Rectangular Screenshot
The most common capture mode. Drag to select any area freely.
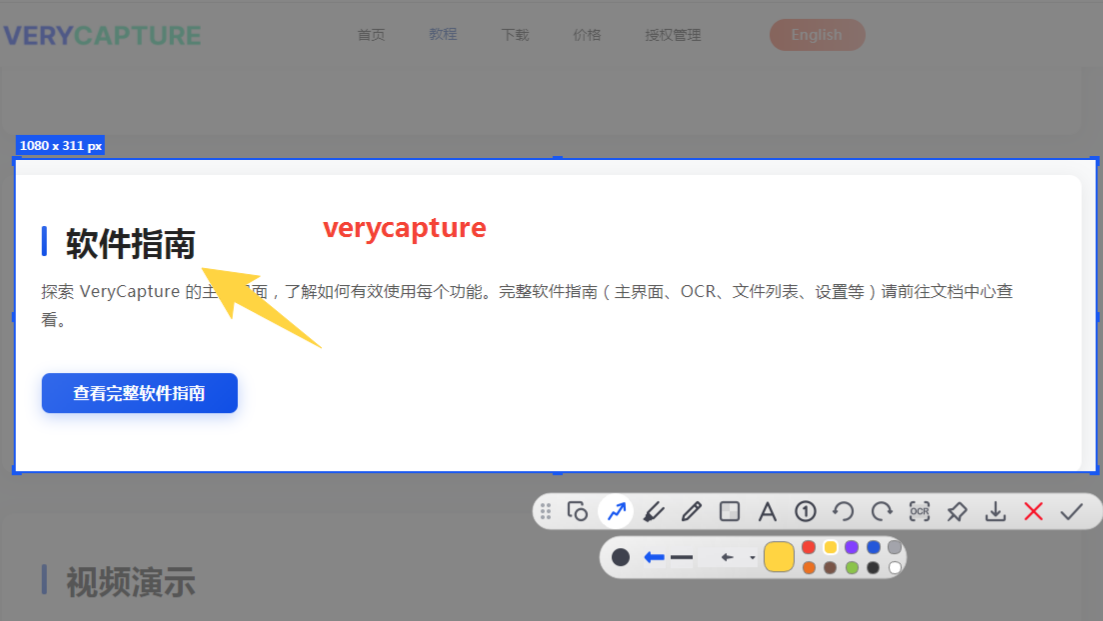
Steps:
- Press the rectangular screenshot hotkey (default values are listed in Keyboard Shortcuts)
- The cursor becomes a crosshair. Hold the left mouse button and drag to select an area
- Release the mouse button. The toolbar appears automatically for annotation or saving
Toolbar actions:
- Click annotation tools (rectangle, arrow, text, and so on) to mark up the screenshot
- Click Copy to copy the screenshot to the clipboard
- Click Save to save it to the configured folder
- Click Pin to keep the screenshot on top of all windows
- Press
Escto cancel the capture
Full-Screen Screenshot
Capture the entire current screen with one action (on multi-monitor setups, the screen where the mouse is located).
Steps:
- Press the full-screen screenshot hotkey
- The capture completes automatically and is saved or previewed according to your settings
Freeform Screenshot
Draw a freeform curve to select an irregular area.
Steps:
- Press the freeform screenshot hotkey
- Hold the left mouse button and draw along the edge of the target area
- Release the mouse button. The selection closes automatically and the screenshot is taken
Delayed Screenshot
Capture automatically after a countdown, useful for menus, tooltips, and other transient UI.
Steps:
- Press the delayed screenshot hotkey
- A countdown appears on screen
- Set up the interface before the countdown ends. The screenshot is taken when it reaches zero
Tip: You can adjust the delay duration in Settings.
Long Screenshot (Scrolling Capture)
Stitch multiple screen frames into one long image, ideal for long web pages or chat logs.
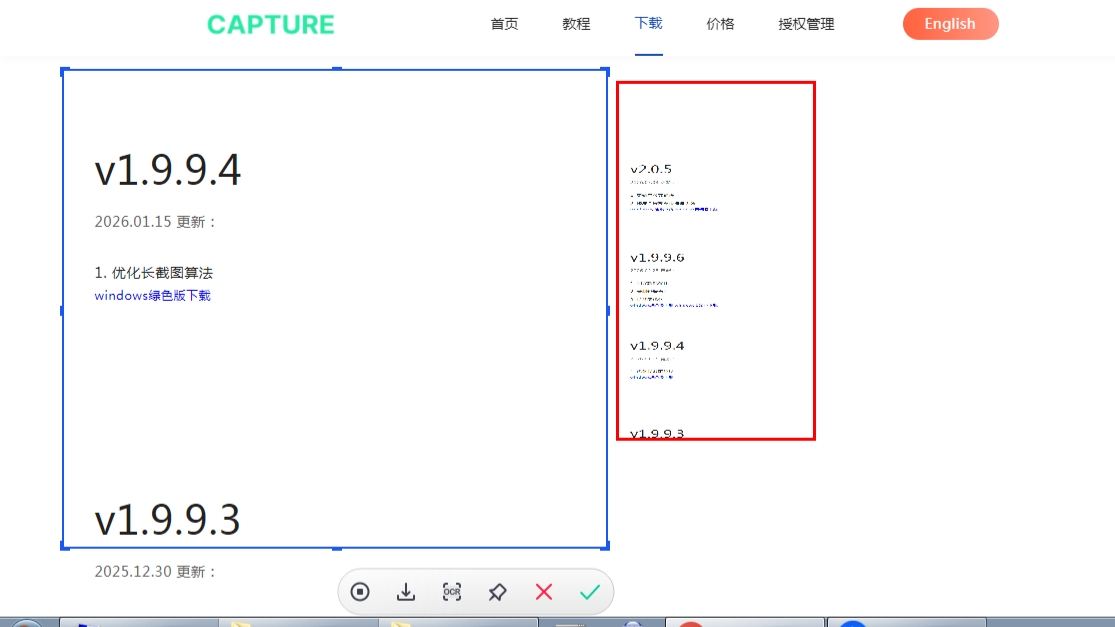
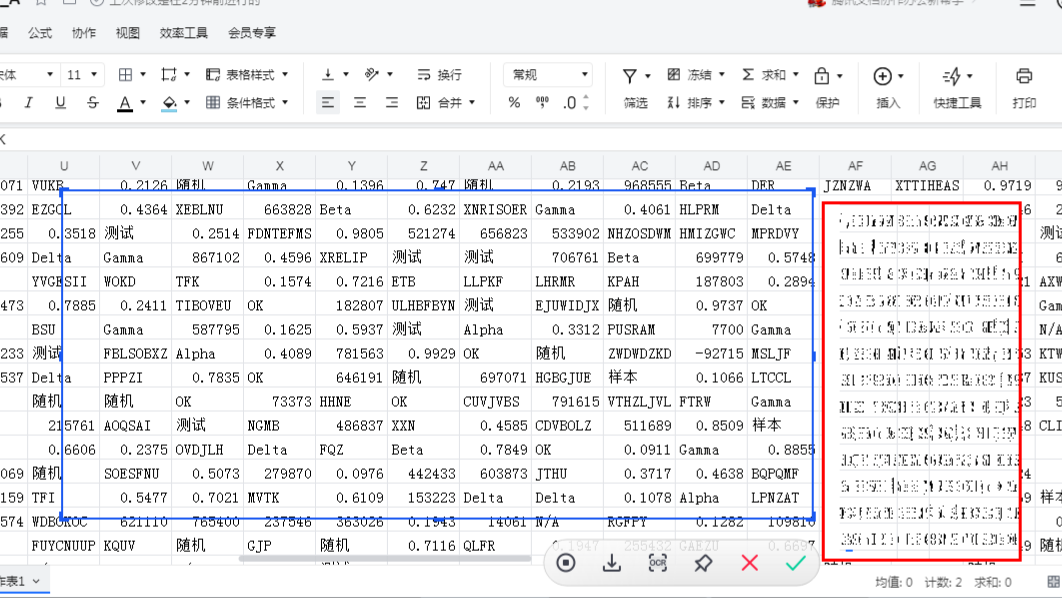
Steps:
- Scroll the content you want to capture to the top
- Press the long screenshot hotkey
- Drag to select the capture area (for example, the main content column of a web page)
- Recording starts automatically. Scroll down slowly
- When scrolling is finished, click Stop on the toolbar
- VeryCapture stitches all frames into one complete long image
Notes:
- Scroll slowly and steadily. Scrolling too fast can cause misalignment or overlap
- Long screenshot only supports top-to-bottom scrolling
- Select an area with distinctive content such as text or images. Avoid solid-color or gradient backgrounds
- If stitching fails or the result looks wrong, Pro users can enable Debug long screenshot under Settings → General and run the capture again. When enabled, the app saves debug images from the stitching process to help troubleshoot. Contact support with those files if needed